Showing posts with label tutorial. Show all posts

Pillow Case Tutorial


When I first decided to learn to sew, I thought it would be fun to make skirts and shirts and thought, because I was already crafty, I would immediately become a seamstress.  Although my first project wasn’t horrible, I had (and still have) a lot to learn. I felt overwhelmed by everything there was to learn, struggled with tasks as simple as cutting straight, and considered giving up.

But it was during one visit to the fabric store, that I found my inspiration to not only learn to sew, but eventually to create Shop for Hope.  It was among all of the colorful and fun fabric prints that I saw a flyer for ConKerr Cancer and how sewing pillow cases can be a simple, meaningful support to children with cancer. I am close with the struggles of childhood cancer that children and families endure through my work with The Hope Express, so I immediately knew this was a sign from God not to give up.  If I continued to learn and practiced by making pillow cases, I could improve my sewing and make a difference. It also gave me an excuse to buy all of the fun and colorful patterns that I loved, but wasn’t sure what to make with them.
 
So with a new sewing machine from my Mom, sewing lessons from an incredible instructor at the Mt. Airy Learning Tree, and bright, beautiful patterns from Gaffney’sFabrics, I was set to create and make “a case for smiles.”

 
It has been about three years now and I have continued to learn and improve on new techniques and projects, but sewing pillow cases brings me the most joy because I know that joy will go with it, through the mail, to the hospital and into the loving arms of a child with cancer.

You too can bring smiles to children who are in the hospital, simply by sewing a fun pillow case. Pillow case are fun to sew and make perfect gifts, bedroom additions, Halloween candy sacks, wrapping for other gifts, etc. Make one for a loved one and one for ConKerr Cancer. Here’s how…

 
Pillow Case Construction (from ConKerr Cancer’s Website)
  • Use cheery fabrics for kids – colorful and fun as possible
  • Remember many patients are adolescent boys and girls, pillowcases appropriate to teenagers are always needed 
  • Cotton or flannel only
  • Basic sewing instructions
 
Looking for more challenging pillow case instructions? Try these methods.
 
Other ways to support ConKerr Cancer


 Shop for Hope
 
For every pillow case purchased at Shop for Hope, one pillow case will be sewn and donated to ConKerr Cancer in your name.    


Plant Part Costume Tutorial

Every other week, my amazing Head Start students in Germantown come to the Wyck Historic House and Garden to learn about plants, insects, animals, farming, healthy food, etc. This week they continued learning about plant parts and the healthy foods they produce.

We used the art in Eating the Alphabet by Lois Ehlert to illustrate what plants we eat and discussed which parts of the plant they were from. Then we observed plants and signs of spring, played a matching game, sang our plant part rhyme, danced as a fruit bowl and even dressed up like a plant.

The plant part costume was something the kids loved when learning about plants at The Schuylkill Center’s Farm Camp, so with some felt and a few dollar store items, I had a costume of my own in no time at all.


Plant Part Costume

Materials:
¥   1 Sheet Brown Felt
¥   1 Yards Green Felt or Fabric
¥   Pipe Cleaners
¥   Fabric Garden Gloves
¥   Small Garden Hat or Basket
¥   Decorative Flowers or Fruit
¥   Hot Glue Gun
¥   Needle & Thread or Fabric Glue
¥   Velcro

Instructions

Roots:
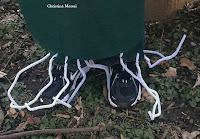
1.     Cut two 2-inch wide strips of brown or green felt.
2.     Cut small slits in the middle of the strips about a ¼ inch apart for as many pipe cleaners (roots) you wish to use. I used six.
3.     Insert pipe cleaners, twisting top of cleaner around felt to secure it.   
4.     Add Velcro to ends of strips.


Stem:
1.     Using an apron as a pattern
2.     Cut an apron shape from the yard of green felt or fabric
3.     Sew on ties or cut with pattern


Leaves:
  1.     Lay gloves on top of the green felt or fabric.
  2.     Cut two leaf shapes from felt or fabric large enough to hide the gloves
  3.     Fabric glue or hand-stitch the bottom of the leaf to the bottoms of the gloves
  4.     Use puffy paint, markers, or other paint to create veins on leaves


Flowers/Fruit:
  1.     Pull the flowers and leaves off of a bouquet of decorative flowers
  2.     Hot glue the flowers and leaves to a small hat or basket


Suggestions & Additions:

Costume Additions
One Whole Flower- Create one flower using colored cotton balls or puff balls and felt petals (color and shape of choice)

Add Literacy Labels- Velcro, sew or permanent marker labels to each part of the costume

Add Fruit- Create one flower using colored cotton balls or puff balls and felt petals to create an apple blossom and add a faux apple (or any common fruit and flower)

Books
The Very Hungry Caterpillar by Eric Carl
This book is a classic that the kids know and it can be used to discuss healthy foods v. junk foods.


Eating the Alphabet by Lois Ehlert
This book has bright and beautiful illustrations of a wide variety of fruits and vegetables.  


Personalized Tile Coasters


Creating tile coasters is one of my favorite projects. It began with finally doing something with my beer label collection and evolved into using any cool pictures I had saved. I always cut and save pictures and quotes from magazines, calendars, advertisements, etc. and creating these tiles has been a wonderful and functional way to use these collections. They also make wonderful gifts. I made the beer label coasters for my hard-to-buy-for guy friends and used them in wine and craft beer raffle baskets for friends’ charity events.

I research many techniques online and here is what works best for me. Let me know how it works for you.

Materials:

Mod Podge or DIY Mod Podge
Acrylic Sealer *
Tiles**
Sponge Paint Brush
Scissors
Glue Stick
Photos or Pictures of Choice
Felt
Hot Glue Gun

* Sealers and tiles at Lowes or local hardware stores are significantly less expensive then at crafts stores. If shopping at craft stores, don’t forget your coupons.  
**Explore the tile section at Lowes or local hardware store and get what you like


Instructions:
I am a firm believer in art as a personal expression; therefore my instructions are not measurements and specifics but an inspiration for your creativity. If more exact directions are desired, see links at the end. 

  1. Choose tile and clean with rubbing alcohol or vinegar. Let dry.
  2. Choose picture, quote, photo, or label and cut to desired size and position on tile.  There doesn’t have to be an exact boarder, it really depends on the picture and how you would like it to look. You can also mix and match quotes and pictures, create a mosaic look, use glitter, etc.  
  3. Use glue stick or very thin layer of Mod Podge (or DIY Mog Podge) to secure picture in place. Smooth out and let dry completely.  Too much glue will cause picture to bubble. If this happens, continue to smooth out or pierce bubble with a small pin and smooth out.
  4. Once dry, brush a thin layer of Mod Podge over entire tile in one direction. Let dry at least 15 minutes but the longer the better. Repeat for 3 coats. Let dry completely between coats.
  5. Spray 2-3 coats with acrylic sealer according to the sealer’s directions. This will create a waterproof seal.   
  6. Secure felt to bottom. Cut felt slightly smaller then tile. Glue to back of tile using hot glue gun. This will prevent the coaster from sliding or scratching surfaces.
  7. Enjoy!

Tips & Notes:

  1. Photographs- Use Mod Podge for photos, the DIY version may contain material that will deteriorate photo over time.
  2. Be patient. The longer the drying time between all coats the better.
  3. Hot Glue- Act quickly. Glue and press felt on one side at a time otherwise, the glue will dry before the felt can adhere to it.
  4. Glue Stick- Especially when gluing thinner paper to the tile initially, I find that it is easiest to work with a glue stick to prevent creasing and bubbling. Let it dry completely before applying the top layer of Mod Podge.
  5. More Than a Coaster- These tiles do not have to be just coasters. They can be hung as wall art, made into a counter top, back splash, etc., candle holders, plant stands, glue them together to make one large coaster, add ribbon for wall art or signs, etc. The possibilities are endless. Check back for tutorials on these project extensions.
  6. Imperfection is perfection. Love your art. :0)


Thank you Style Me Pretty for your tutorial that allowed me to put my own creativity into this project and share my art with others.